DIY Glam Halloween Decor
I’m continuing my HalloWeek series on the blog with some more Dollar Tree DIYs. This time I’m making DIYs using some of the many skeleton items sold this season.
I think these turned out so cute and I’m actually using them as some Halloween bedroom decor on my dresser.
Watch the video below to see how I made these project, or keep scrolling to read the tutorial!
Skull Flower Vase

Supplies:
Dollar Tree skull
Dollar Tree floral foam
Dollar Tree black and purple roses
White glossy spray paint
Instructions:
First I’m going to use a utility knife and a candle to help cut the plastic. I first showed this trick in my first video of HalloWeek. Please make sure you’re very careful when doing this, and ask for help if you’re not comfortable using a sharp knife.
Next I took gloss white Rustoleum spray paint and covered the entire skull. I’ll be using this spray paint through the entire video.
After the paint dried, I used some floral foam from Dollar Tree and stuck it inside the skull
I picked up the purple and black roses from the Dollar Tree floral section and cut them off the stems
Then all I did was arrange the flowers inside the skull to make this neat little skull flower vase.
Skeleton Hand Ring Holder

Supplies:
Dollar Tree skeleton arm
Dollar Tree soap dish
White glossy spray paint
Black spray paint
Hot glue
Black sequin ribbon
Instructions:
To make this skeleton ring holder, I picked up this skeleton arm. And I also grabbed this black plastic soap dish.
So I cut the arm at the wrist using my knife, but sharp scissors would also probably work.
After that, I gave the hand two good coats of white spray paint.
I also spray painted the underside of the soap dish black, which is optional if you want to stick with the original transparent black soap dish.
Once both were dry, I used a lot of hot glue to attach the hand to the soap dish.
Finally, to cover up the visible glue, I had a tiny piece of black sequins, which I got at Dollar Tree a while ago. I just wrapped those twice around the wrist of the skeleton hand and secured with hot glue.
And here’s the final jewelry holder. It’s perfect to hold your rings, bracelets, or Halloween accessories
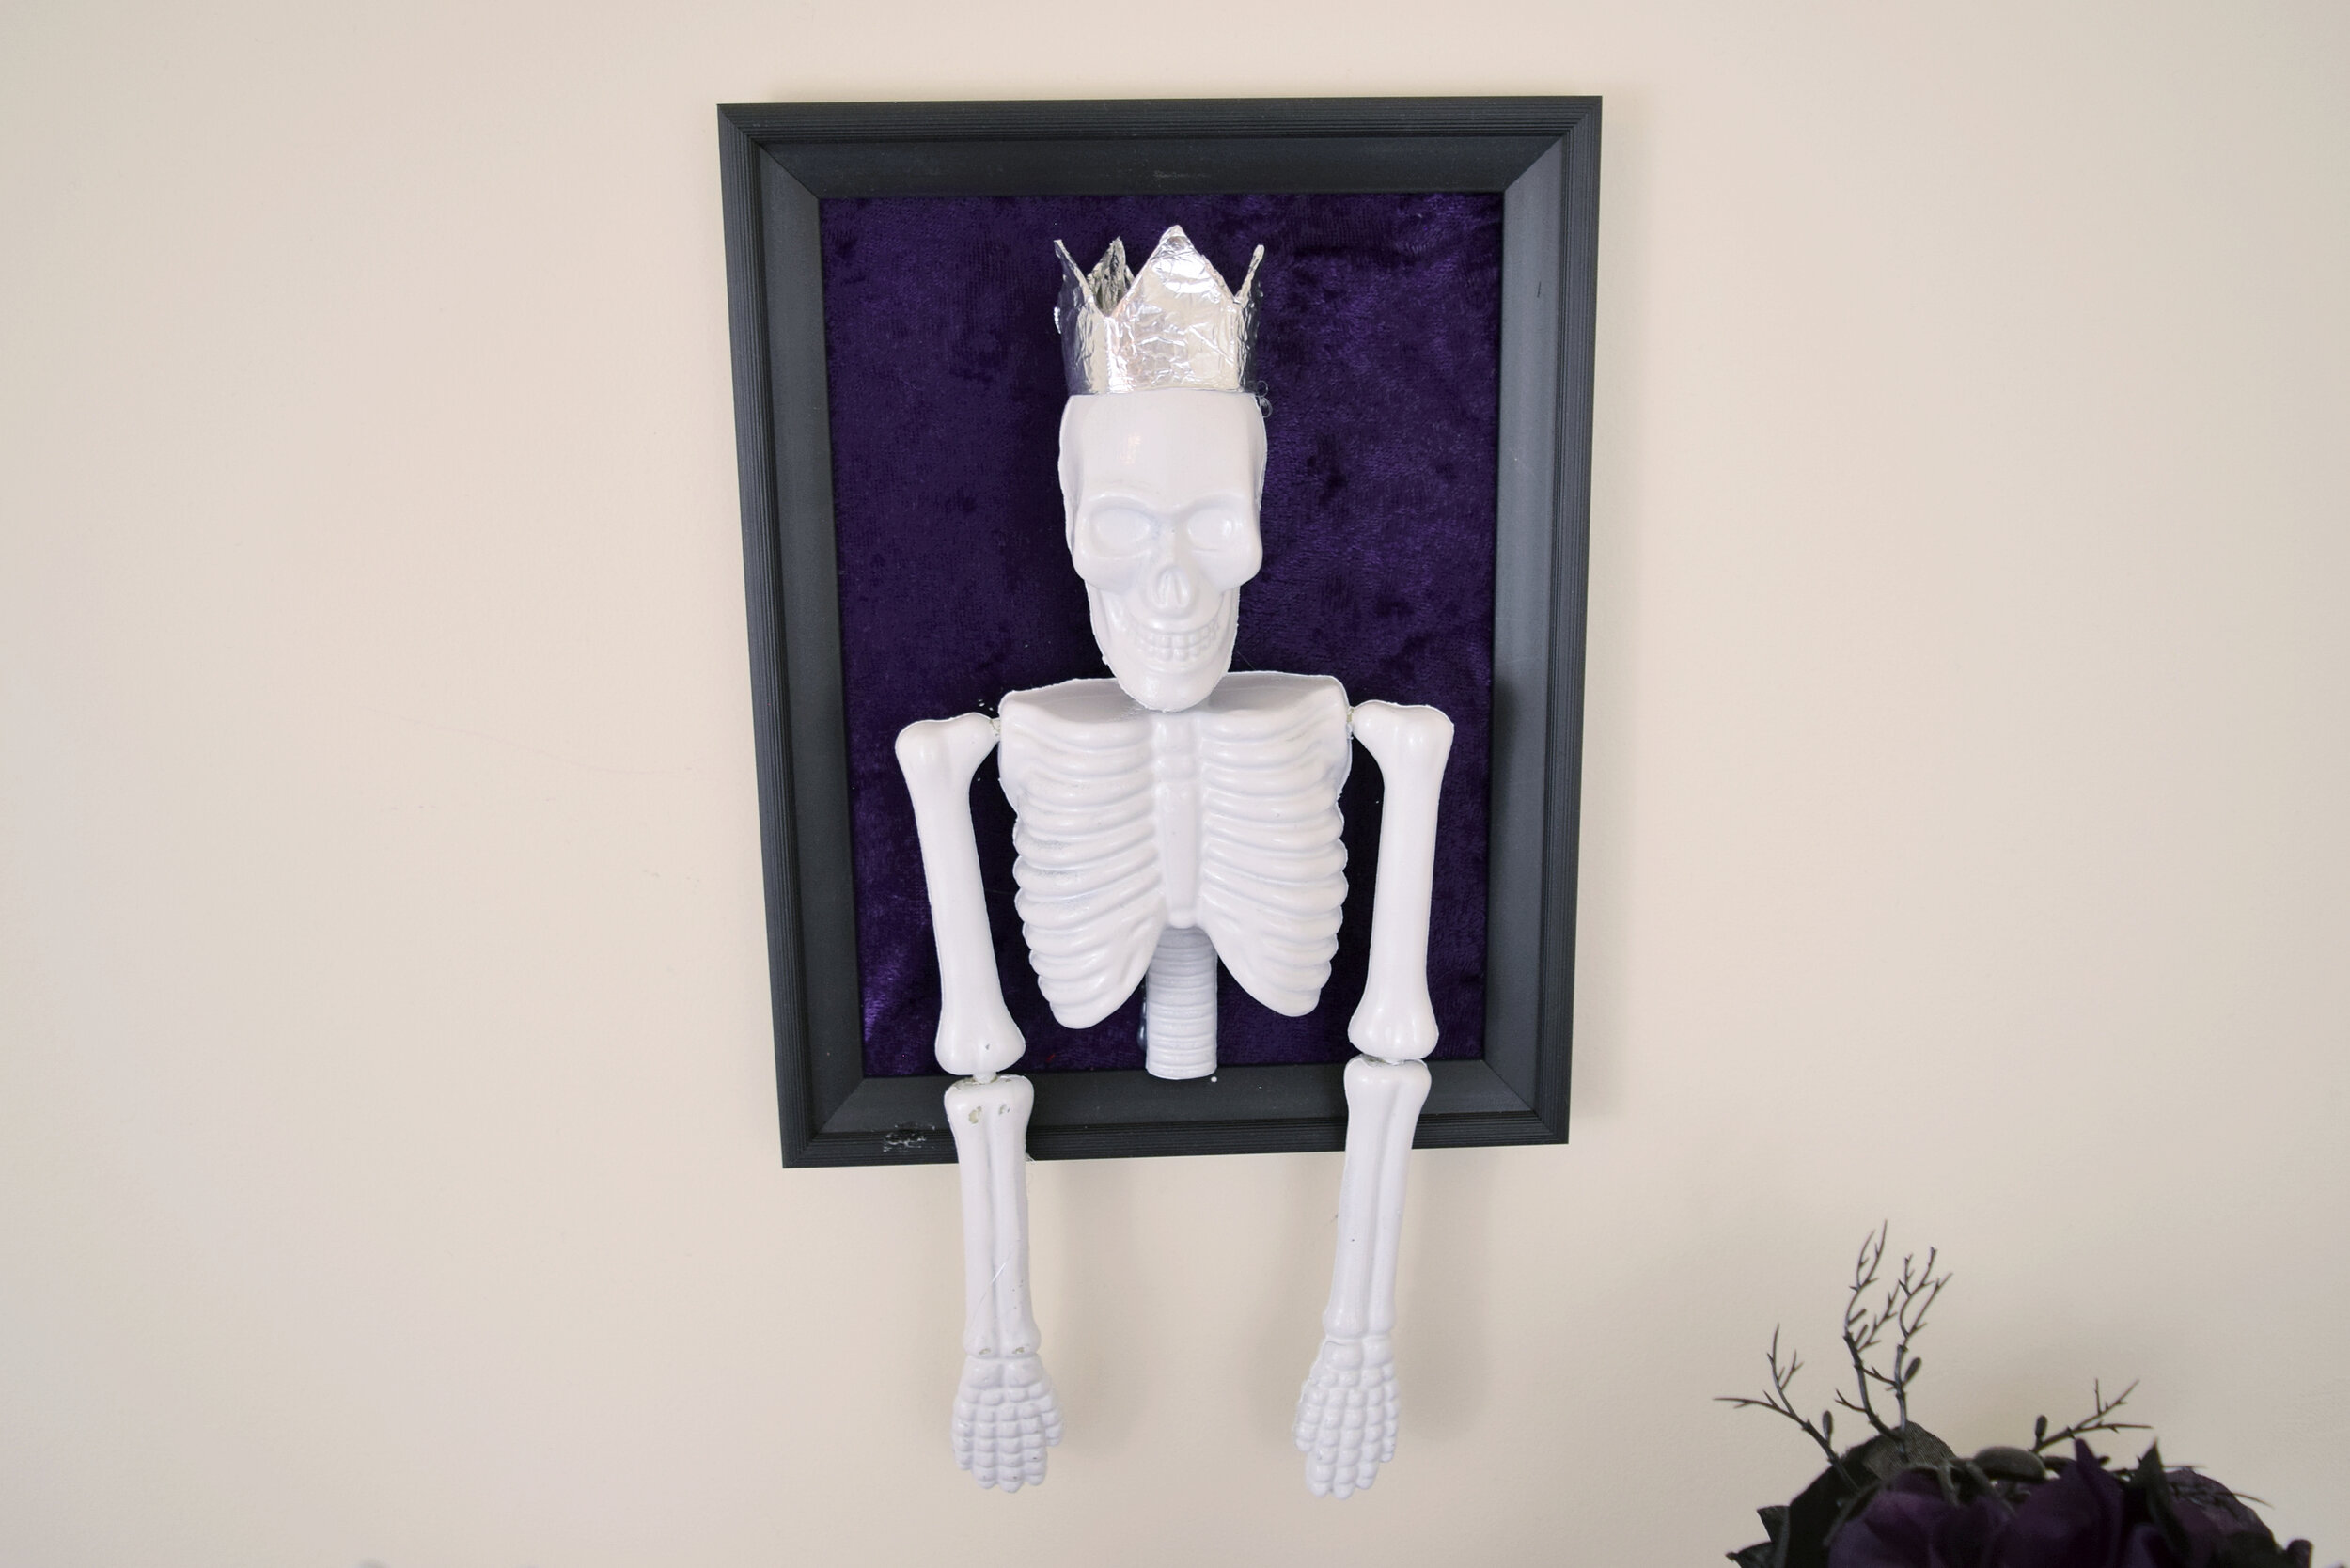
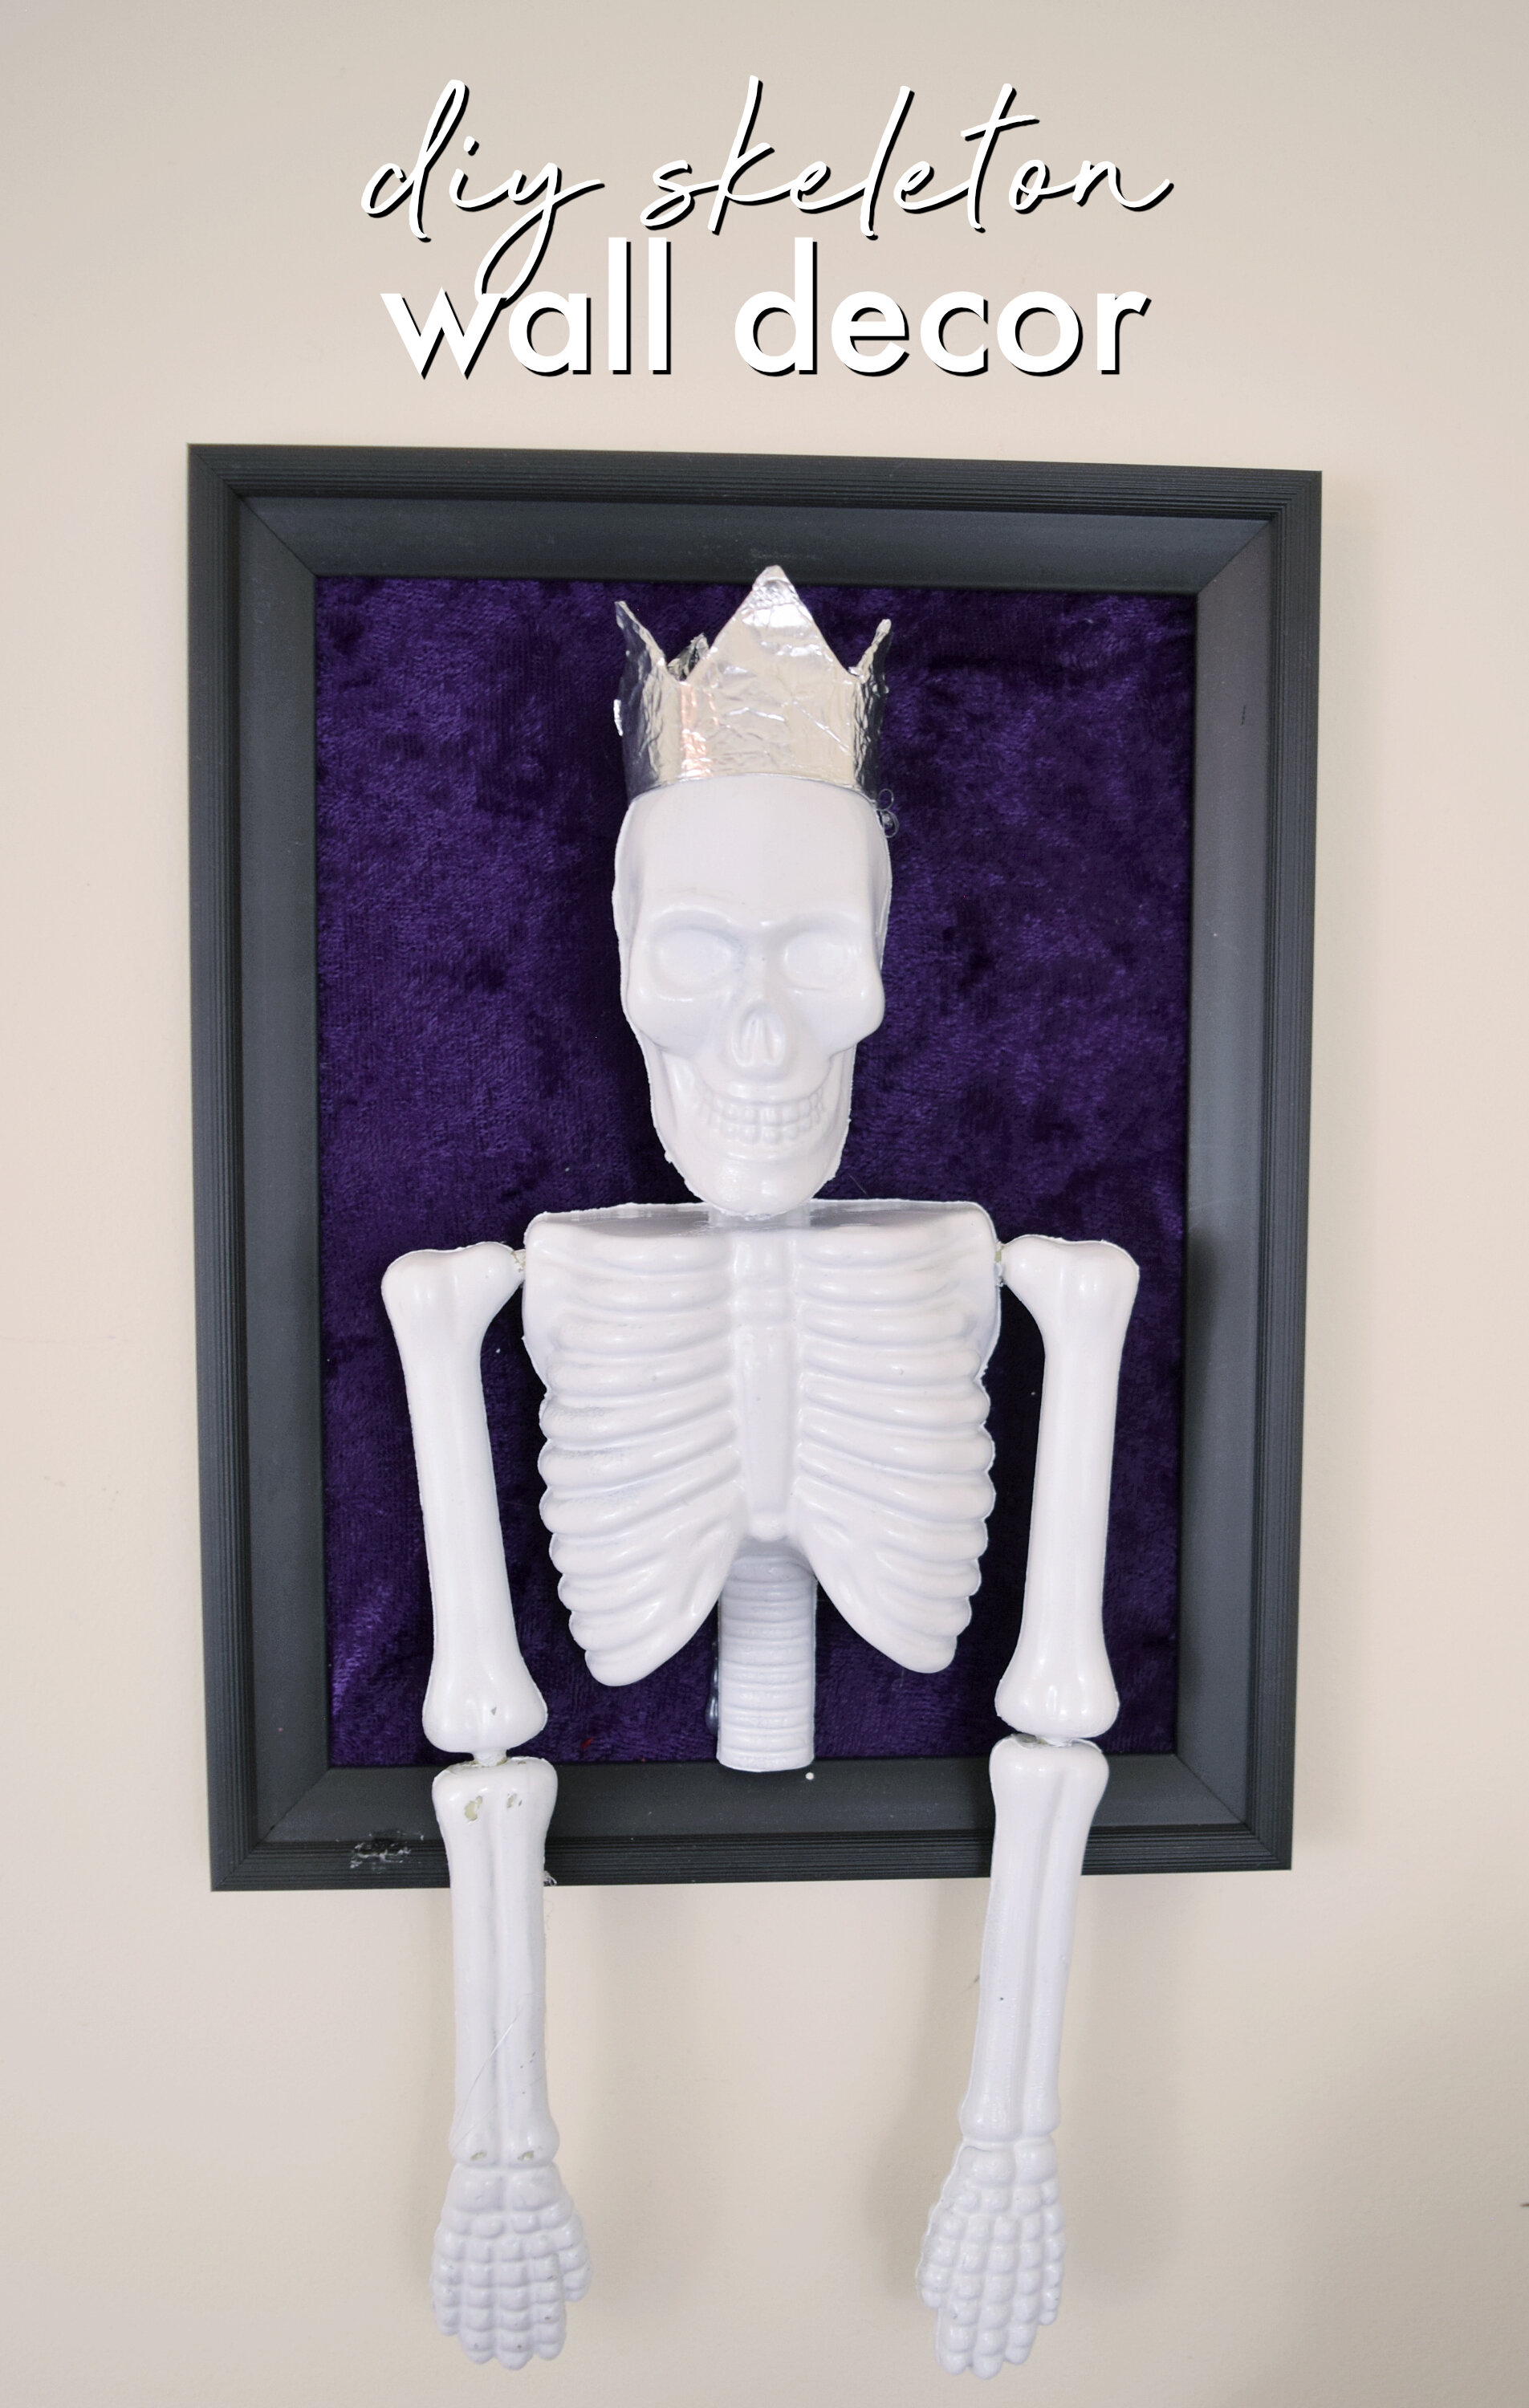
Framed Skeleton Wall Decor
Supplies:
Dollar Tree small skeleton
Dollar Tree frame
Purple crushed velvet
White glossy spray paint
Cardstock or heavy weight paper
Aluminum foil
Hot glue
Instructions:
For the final DIY, I took this cute little skeleton guy and cut him in half just above his hips. I also cut the little plastic piece off the top of his head.
Next, I gave the skeleton a coat of white spray paint.
While the paint’s drying, I took a dollar store frame, removed the backing and then covered it with the purple velvet.
After that, I put the back into the frame.
Next, I used hot glue to attach the skeleton to the velvet.
ince it looked boring as is, and he had a lot of head room. I decided to add some glam by making him a crown.
To make the crown, I folded a strip of cardstock into an accordion so that I could cut even points.
Then I used a bit of aluminum foil to cover the crown.
Once that was done, I glued the crown into a circle shape and then glued it onto the skeleton’s head
pin this post


latest posts