I turned a thrifted sign into bold patio decor
This post contains affiliate links. When make a purchase through these links, I earn a small commission at no extra cost to you.
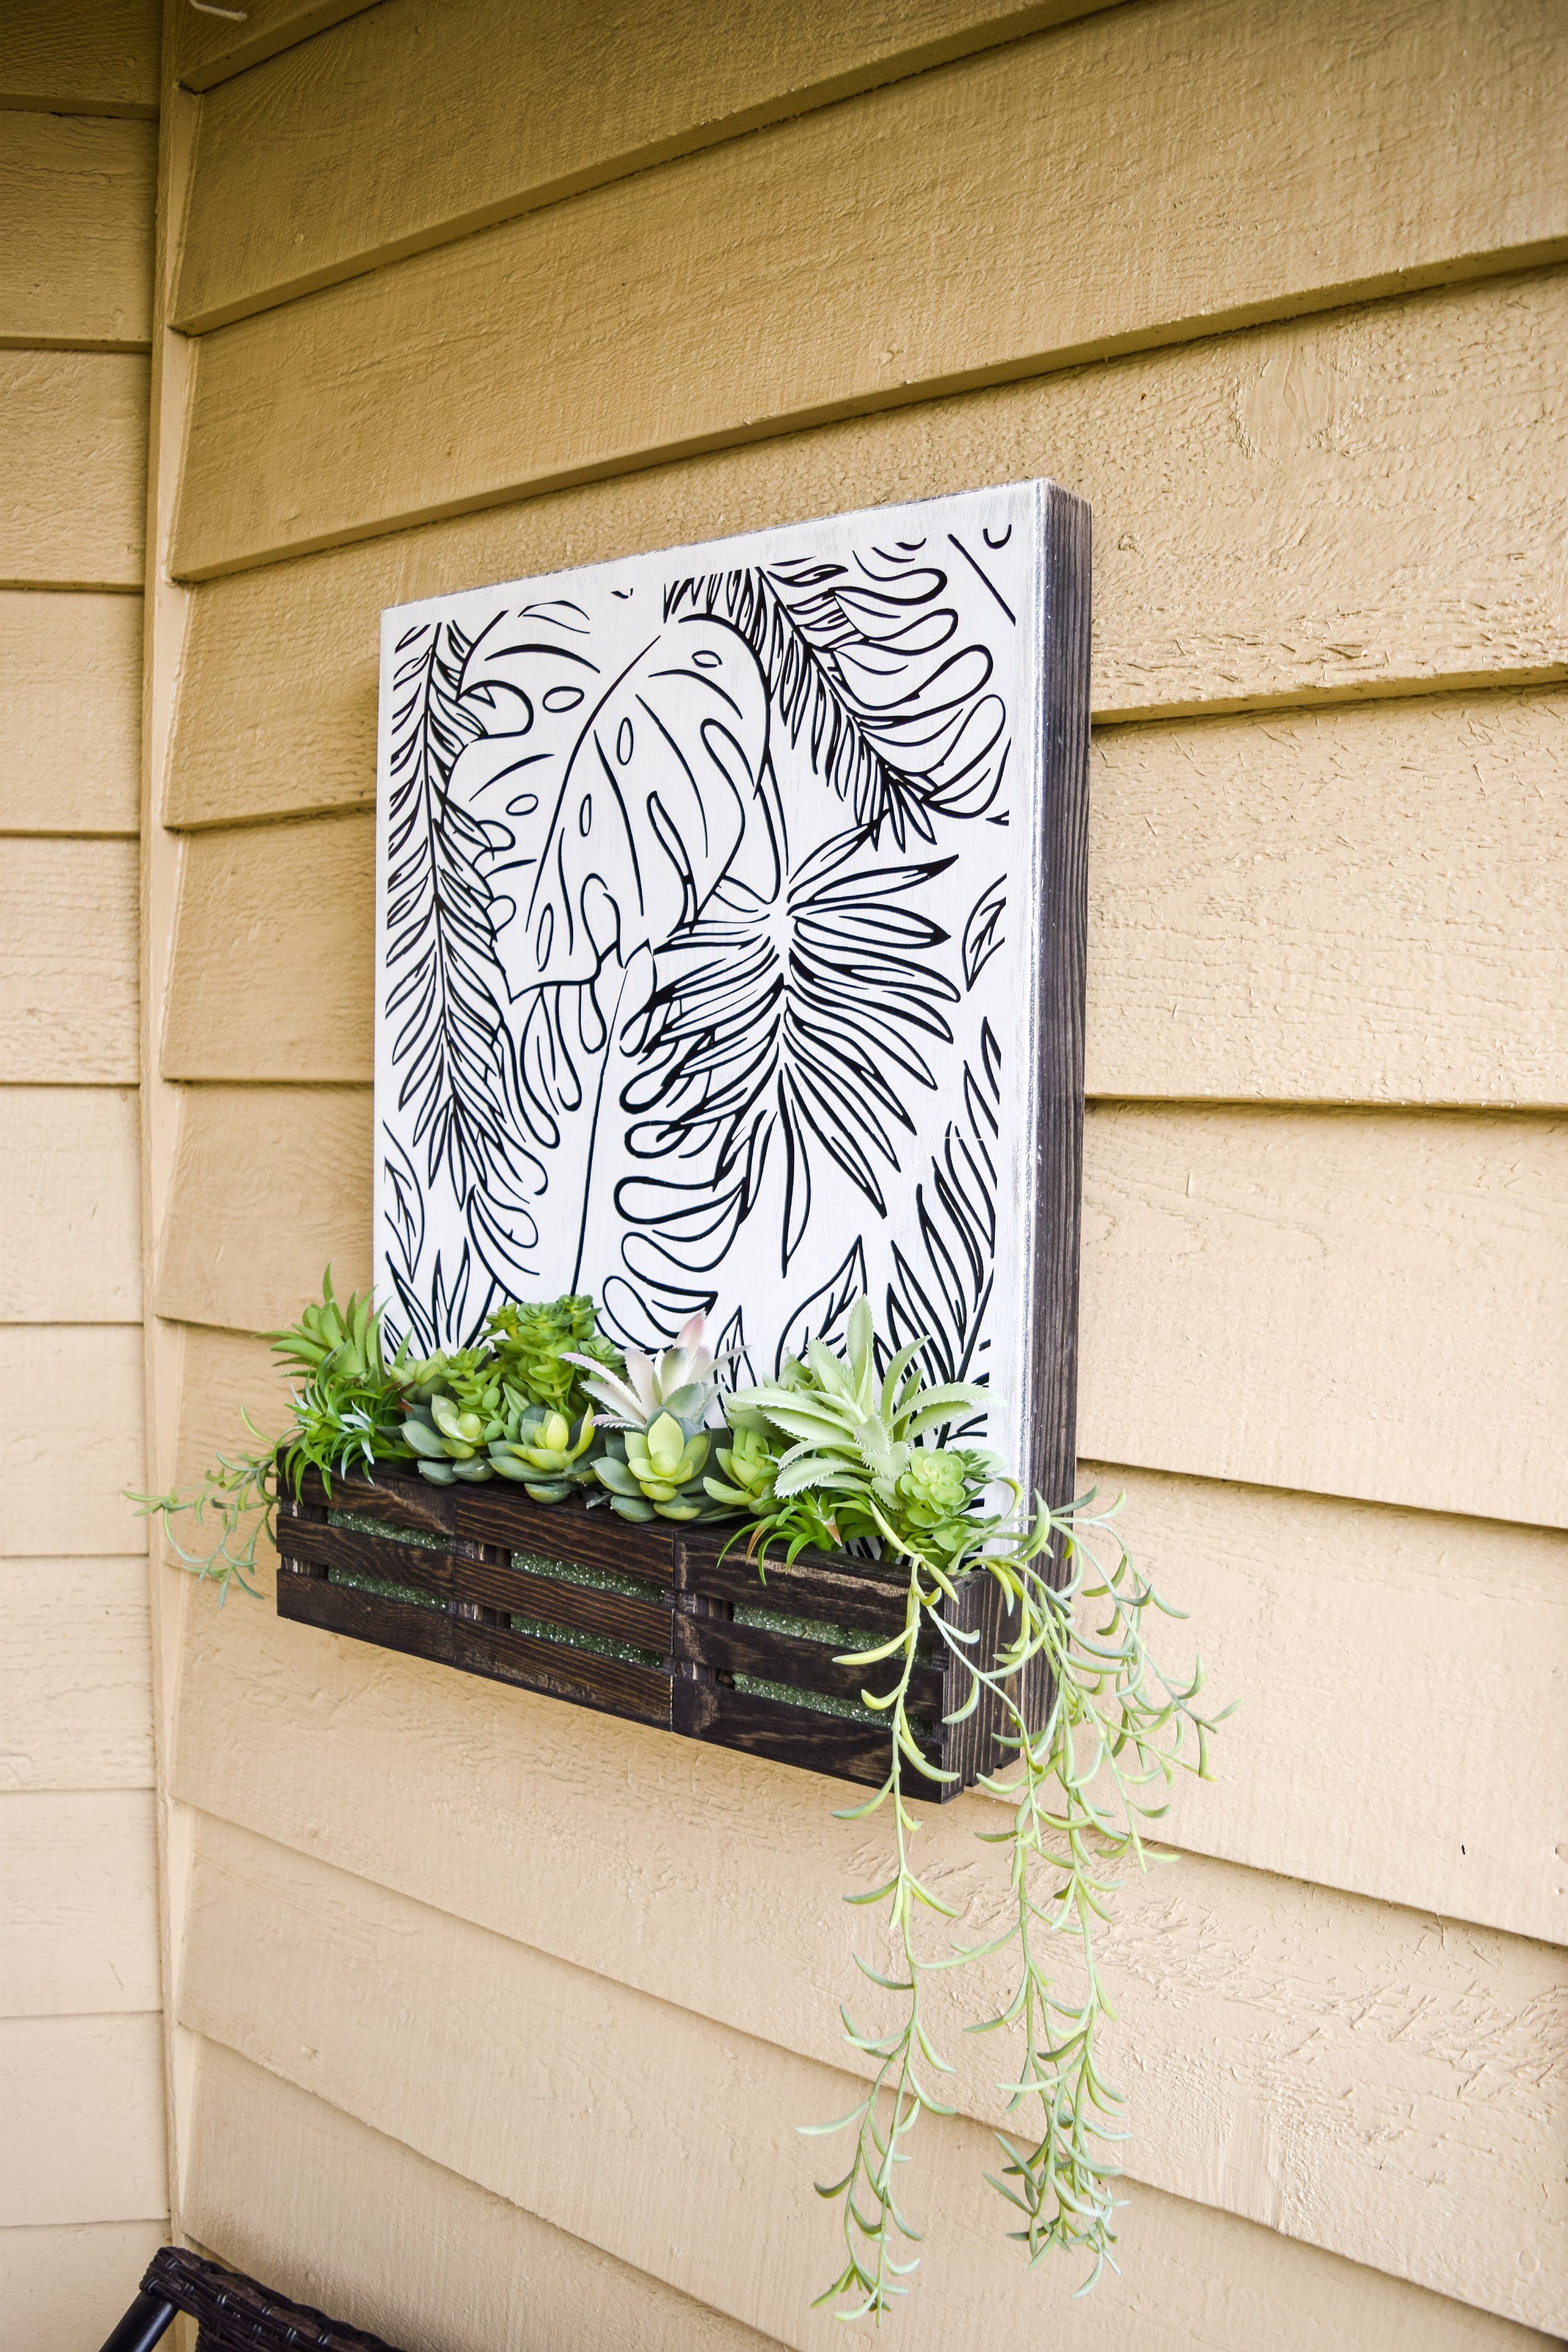
A LOT of planning goes into my design anytime I do a room makeover. One space I love giving a refresh year-after-year is my patio. I knew this year I wanted to create some fun, bold art to hang on the wall.
I came across a solid wood sign at Goodwill, and I knew that would make the perfect base for this project.
I walk you through the entire process to DIY this sign (plus an incredible IKEA tiled table hack) in the video right below. I definitely recommend you check that out. Below the video, you’ll find the link to either the Cricut Design Space project to create this sign, or downloadable files if you do not have a vinyl cutting machine!
How to download the leaf background for Cricut:
Click here to be taken to my shared file in Cricut Design Space.
The graphic is designed in four quadrants in order to accommodate a 12x12 Cricut cutting mat and any size sign you are creating (as long as it is no taller than 24 inches).
Don’t have a Cricut? You can download .PNG files here:
Of course I know not everyone has a Cricut, so here are transparent .png files that can be brought into a photo editing or document editing program and resized to your project. You then could decoupage the prints onto your sign, or use pencil on the back of each print, trace the lines, then go over them with paint or marker.
Download the .pngs here:


Hopefully you can find these designs and art idea useful! If you want even more patio inspiration, check out the links below. ✦
you’ll also love:
Actually Alli is a DIY and home decor blog to help you craft your dream life through DIYs and home decor, all while on a budget. Here you’ll find DIY tutorials, home and apartment inspiration. ✦