DIY Trendy & Modern Room Decor
As I've been browsing Pinterest, TikTok and Instagram the past few weeks, I've noticed several viral trends for home decor: funky twisted and curved candles (and candle holders), textured vases and decorative objects that make an impact.
I wanted to create my own versions of these trends to show you how to DIY your own trendy room decor on a budget.
Watch the video above if you want to learn how to make these three DIYs, then keep scrolling for the supplies and details you’ll need for these projects!
So let’s dive in how to make each of these projects, starting with the curved candle holder using air dry clay.

Clay Curved Candle Holder
Supplies
Air dry clay or polymer clay
Aluminum foil (optional)
Acrylic paint
Baking soda
Paint brush
Taper candles

1) This first step’s optional, but I decided to build the base of this candle holder with some aluminum foil. I ripped off a sheet, then rolled it up, then bent it into a U-shaped curve.
2) Then I started adding the air dry clay by taking pieces, flattening them out on the table, then forming it around the foil. Now I do NOT recommend using the terra cotta clay you see in these images because it is so fragile that my candle holder just barely survived the “final results” pictures. Just learn from my mistake and get regular white air dry clay or polymer clay.

3) Next, I took one of my candles and formed the ends of the clay around the candle. Now you could let the clay dry with the candles in it, or take them out and set it aside until completely dried.

4) The next day, I mixed up a few paint colors to create a creamy beige color, then added in equal parts baking soda and mixed it up to create a nice texture on the candlestick.
5) Then all you have to do is let the paint completely dry and it’s ready to style.

Wood Slice Decorative Objects
Supplies
2 wood slices in different sizes
2 dowels cut to 7.5 inches and 6 inches
Wood rounds to use for bases (mine are from Hobby Lobby)
Special Walnut wood stain
Matte black acrylic paint
Glossy finish polyurethane
Drill
Gorilla brand/strong bond hot glue

1) Next I wanted to make a set of decorative objects that would be cute on a mantle or shelf. I started with these two different sized wood slices from the craft store.

2) First, I sanded the bark off the wood slices as best as I could using 240 grit sandpaper. You don’t have to completely remove the bark, but this DIY looks much more modern when the wood slices have clean edges.

3) After that, I used some special walnut stain to stain both wood slices. I used a foam brush to apply it as immediately after it was on, I used a paper towel to soak up the excess stain. I sort of wish I would have used a lighter stain color because the wood slices soaked the color up right away. But as the stain dried, some of the depth and color returned.

Use a hack saw to cut the dowels down to the right size
4) While that stain was drying, I took a small dowel and cut it down to a 7.5 inch piece and a 6 inch piece.
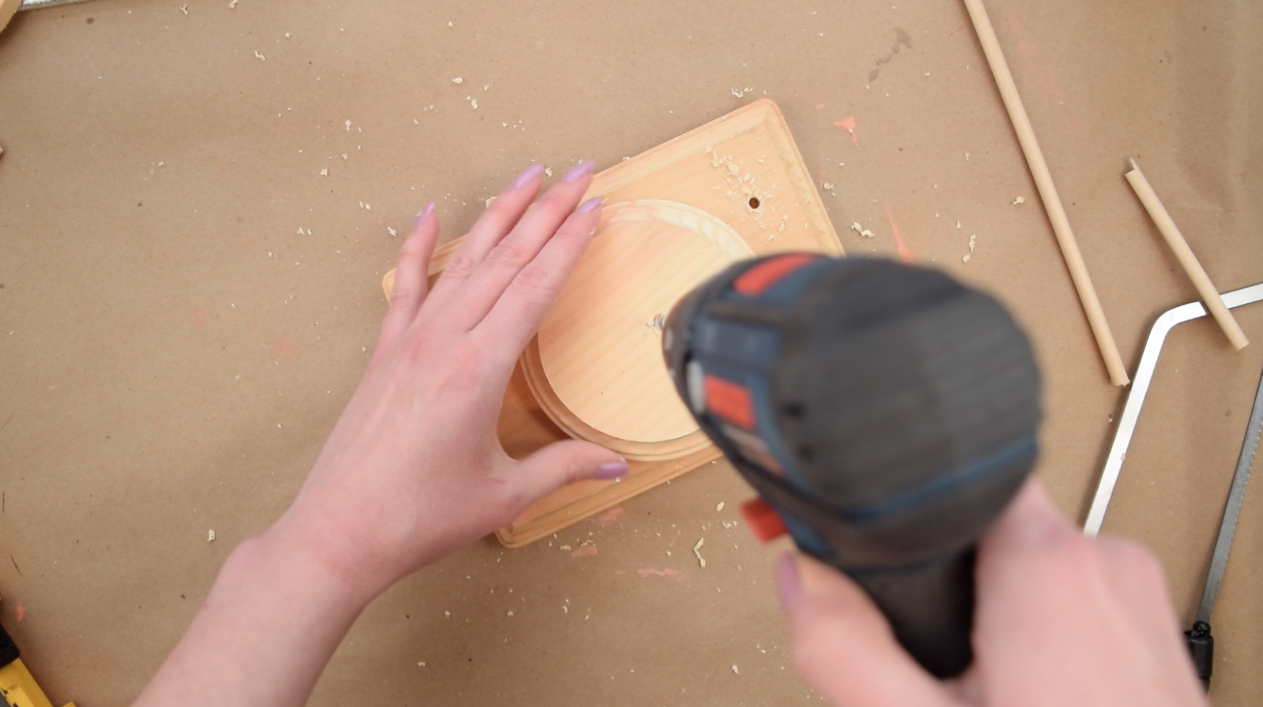
Drill holes in the center of each wood plaque
5) I then took two round wood plaques, these are from Hobby Lobby, used a tape measure to find the center, then used my drill to drill a hole in the middle big enough for the dowel to fit snugly inside.
6) Then I painted the plaques and dowels with matte black paint.

Drill a hole in the bottom of each wood slice
7) I waited overnight before assembling these decorative objects. I first carefully drilled a hole in the bottom of each wood slice.

Assemble the dowels, plaque and wood slices using hot glue to complete you decorative objects
8) I then used a little bit of Gorilla brand hot glue to attach the dowel to the hole in the wood slices. I love this glue for projects like these because it bonds much stronger than regular hot glue. I then repeated the same thing to attach the dowels to the plaques. (TIP: to clean up any visible glue, just paint over it with the black paint.)
10) As a finishing touch, I used some gloss poly finish to add some shine to the wood slices and bring out the depth of the wood grain.

Textured Vase using Caulk
Supplies
Glass vase
Caulking
Baking soda
Acrylic paint in taupe, cream and dark brown
Paint brushes

1) For this third project, I wanted to try a new technique to make a textured vase. I’m starting with a simple glass vase, this is from Dollar Tree.
I started by mixing up a few colors of paint to make a taupe brown color, and then added equal parts baking soda to paint just like I did earlier in this video.
I only painted the mixture onto this section you see me painting here, I decided I didn’t need to waste paint on the whole vase. I did two coats of paint, letting it dry completely in between.

2) Next, I’m using a tube of caulking from Dollar Tree to make texture on the vase. I just squeezed it onto the vase and then used my finger to create the texture. I tried to create a consistent horizontal line sort of texture. On the painted section, I roughly speared the caulking to overlap the paint, but not completely cover it.
3) Once the caulking dried, I painted over it with a cream colored acrylic paint to make the caulking more opaque.

4) Once that paint dried, I made up a watered down paint mixture and brushed it all over the vase. I used a paper towel to roughly brush off the excess paint, so that it mostly just settled in the indentations and cracks for some depth.

5) Finally, I thought the vase was looking a bit dingy, so I used more of the cream paint to dry brush on top of the caulking on the vase, keeping a very light hand to preserve the depthy created by the brown wash.
And those are my 3 easy and modern home decor DIYs! I encourage you to watch the full video tutorial leave a comment to say hi, I love making new friends! ✦
you’ll also love:
Modern Boho Dollar Tree DIYs
pin me!


Actually Alli is a DIY and home decor blog to help you craft your dream life through DIYs and home decor, all while on a budget. Here you’ll find DIY tutorials, home and apartment inspiration. ✦