DIY Moroccan Tile Tray (+ how to inset the tile!)

This post contains affiliate links.
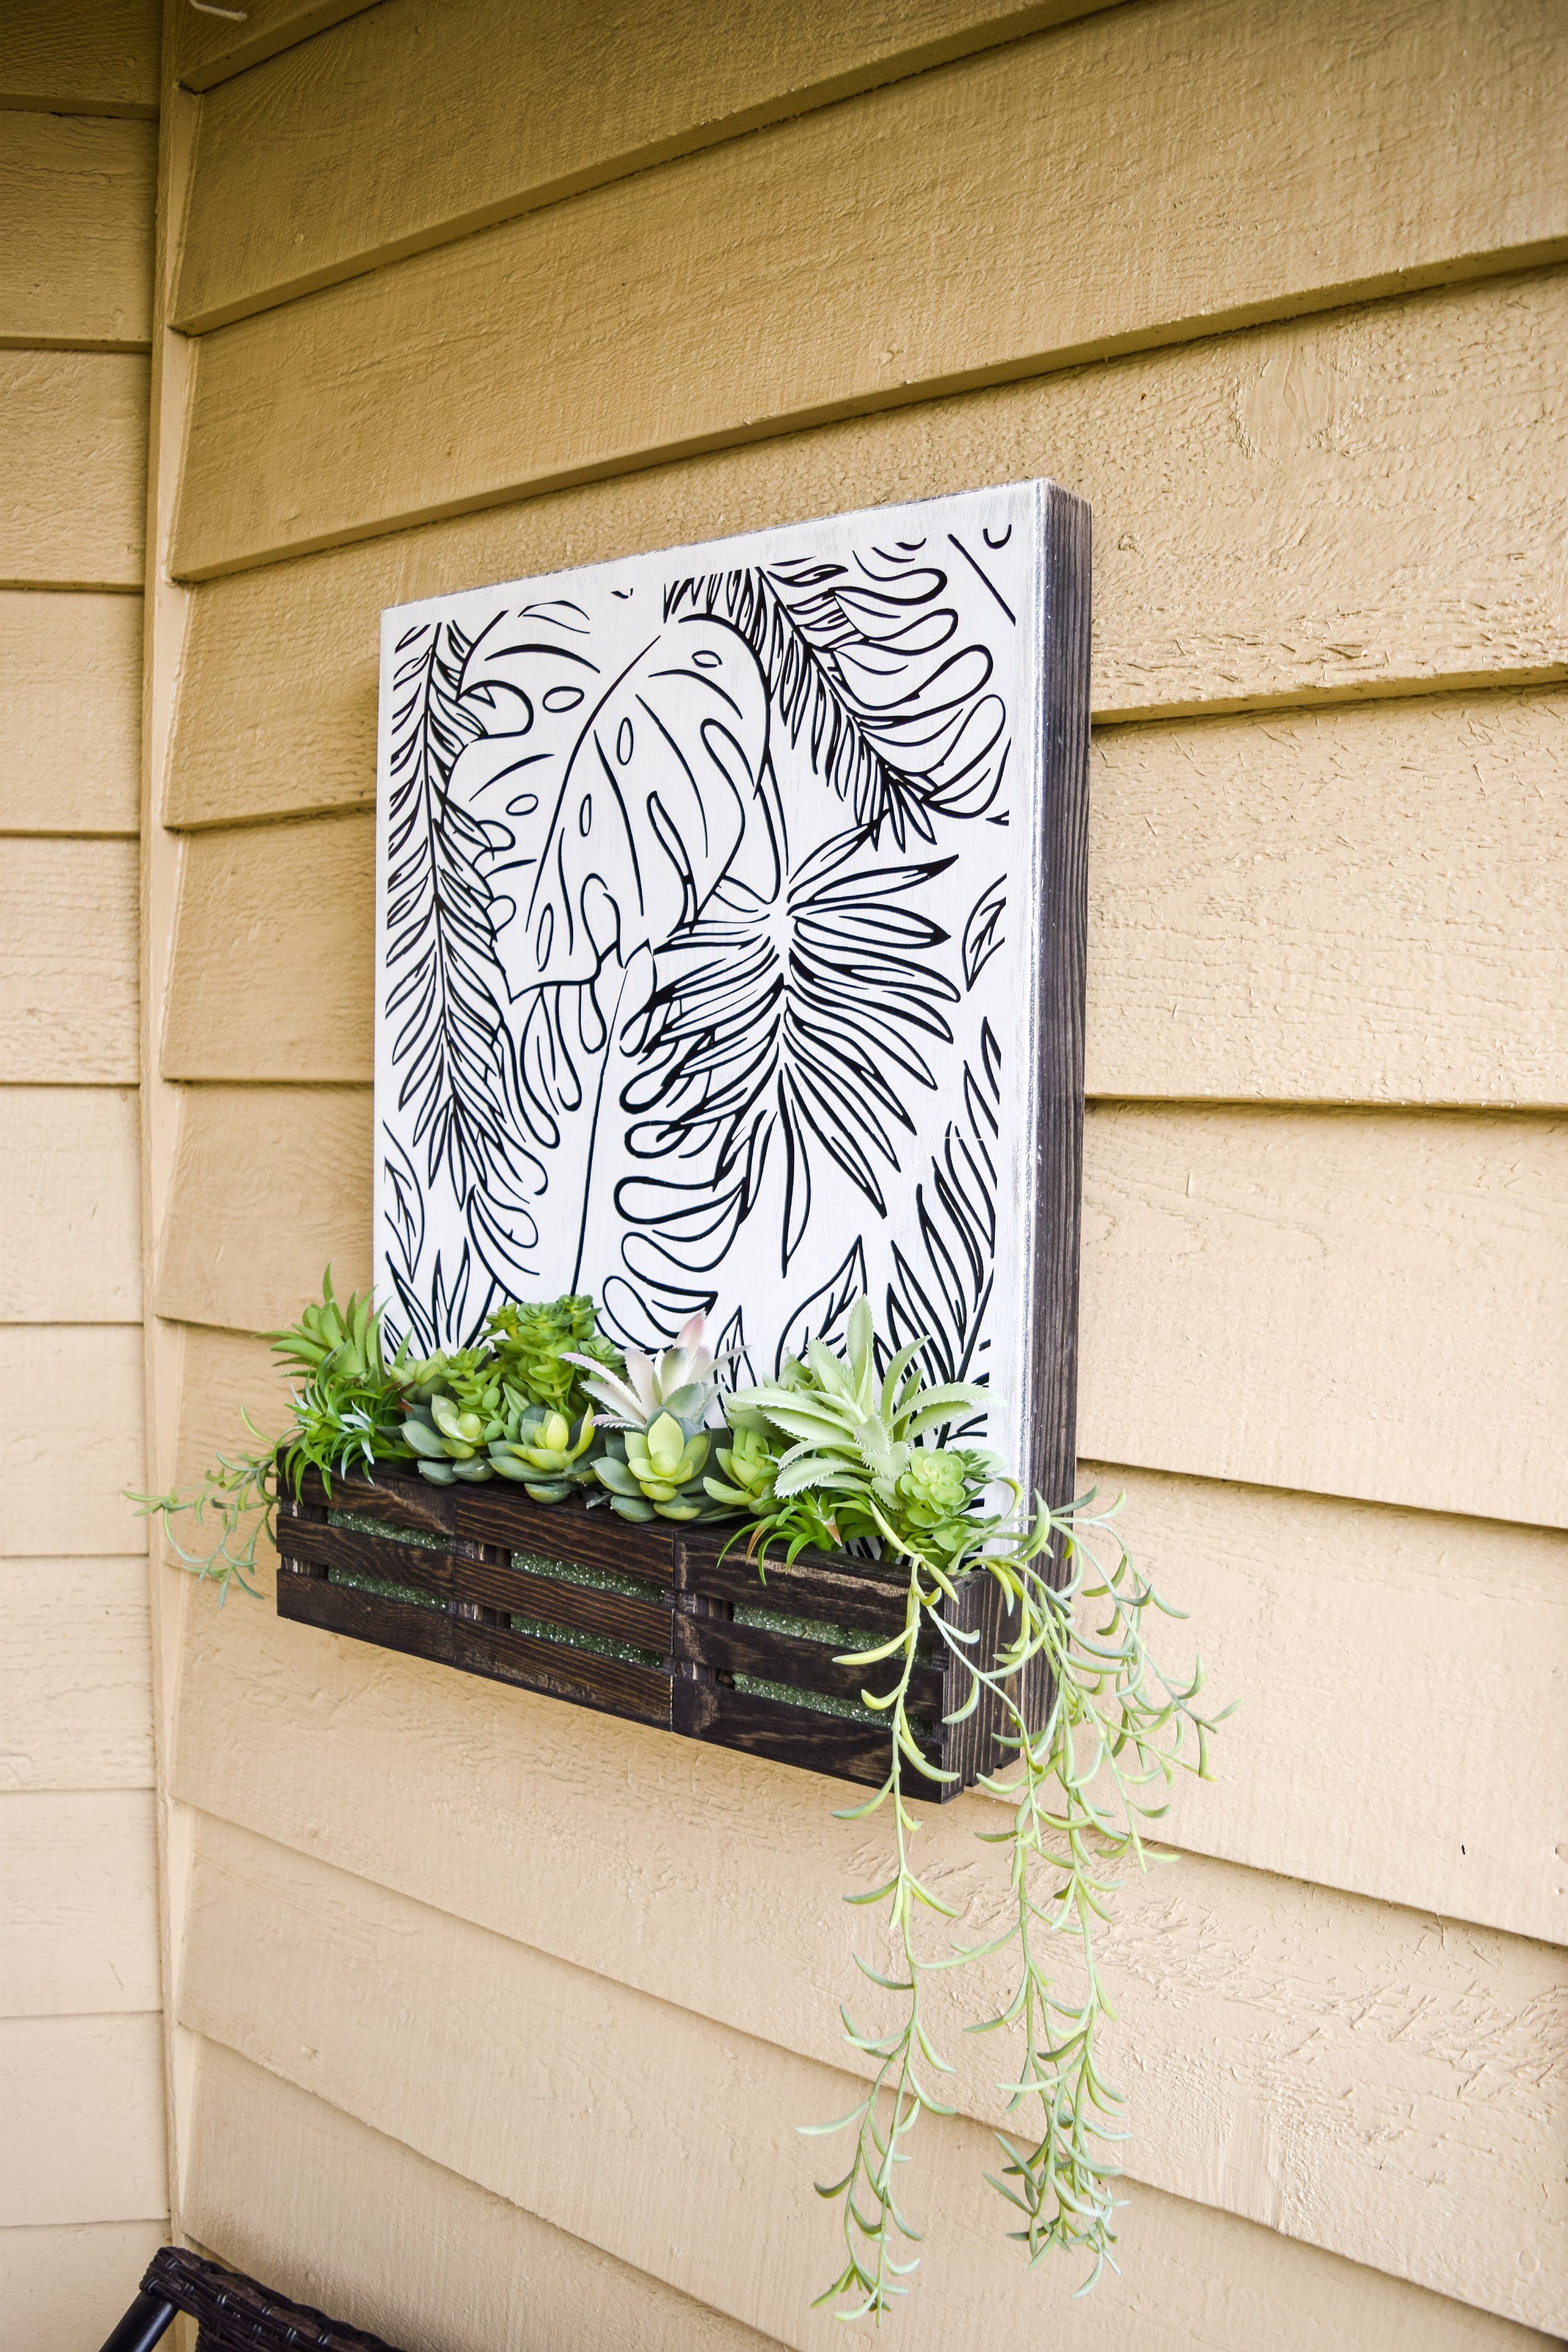
Currently, I’m working on decorating my apartment balcony and I wanted something pretty to place on my side table that’s also functional for holding drinks, candles, etc.
That’s why I DIYed the Moroccan tile tray you see above with some inexpensive supplies and it has to be my favorite DIY I’ve done so far.
Now, you may be thinking, I can go on Pinterest and find all sorts of tutorials for a tiled tray, why are you making your own tutorial? Well, two reasons:
Many of the tutorials you construct your own tray from scratch and I have no power tools to do so.
The tutorials with pre-made trays required you to cut apart your sheet of tiles and space them out yourself, which I wasn’t a fan of.

So I decided to modify my tray to inset the tiles!
Could I have just spread the tiles in the tray out instead of keeping them on the sheet? Absolutely. Did I think that would look as good as insetting the tiles? No. So I decided to go the long and (not-so) hard route to make this DIY into the Moroccan tile tray of my dreams (...is it weird that this is something I have dreamed about?).
This project takes a lot of patience and several days to account for glue dry time, so keep that in mind if you want to make this tray for yourself!
Watch the video tutorial here:
Supplies:
Hacksaw (I got mine at Dollar Tree and it worked fine)
Electrical tape/painter’s tape
Sandpaper
Wood stain in color of your choice (I used my favorite, Early American)
12”x12” sheet of tile of your choice (I found 2” tiles works best for this DIY)
Grouting tools (bowl of water, sponge, rag, old plastic card or applicator, gloves)
Hot glue
Jute twine
Instructions:


1) I started with a 11”x14” wood tray from Joann Fabrics that I got on sale for about $7. This tray isn’t the highest quality, but it is perfect for this DIY.
2) Pick out your tile. I found 2”x2” tiles on a 12”x12” sheet will work the best for this size tray.

3) To create an inset look for the tile, I picked up 4 ¼” square dowels from the hardware store (you can get them at craft stores too) and measure and mark them down to size. Here is the measurement breakdown for this size tray:
Cut 4 pieces at: 10 ¼”
Cut 4 pieces at: 12 ¾”
4) Use a hacksaw to cut down the dowels at the correct measurements.
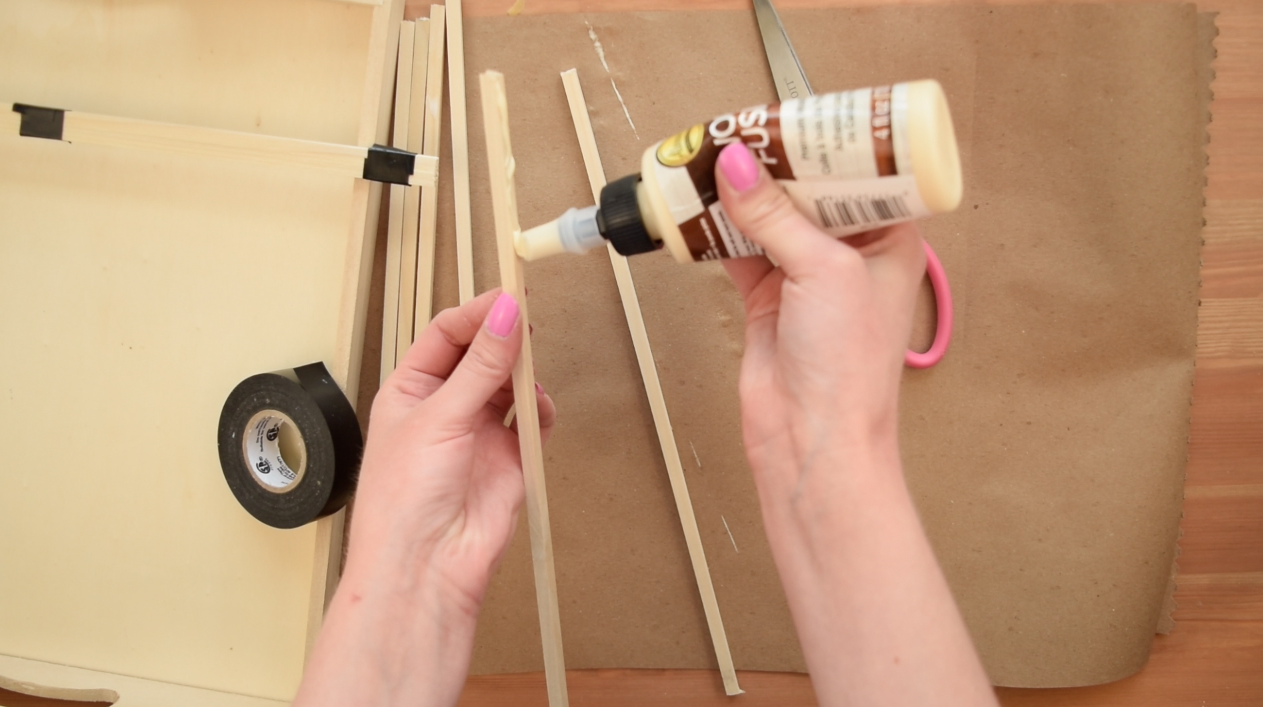

5) Next, pair up the dowels and use wood glue to adhere the pieces together. To make sure the glue dries properly, I used electrical tape to hold them in place.
6) Once all the dowels are dry, remove the tape, then give them a really good sand to get off the excess glue. And since I was already sanding, I also gave the tray a good sand to get rid of the rough edges.
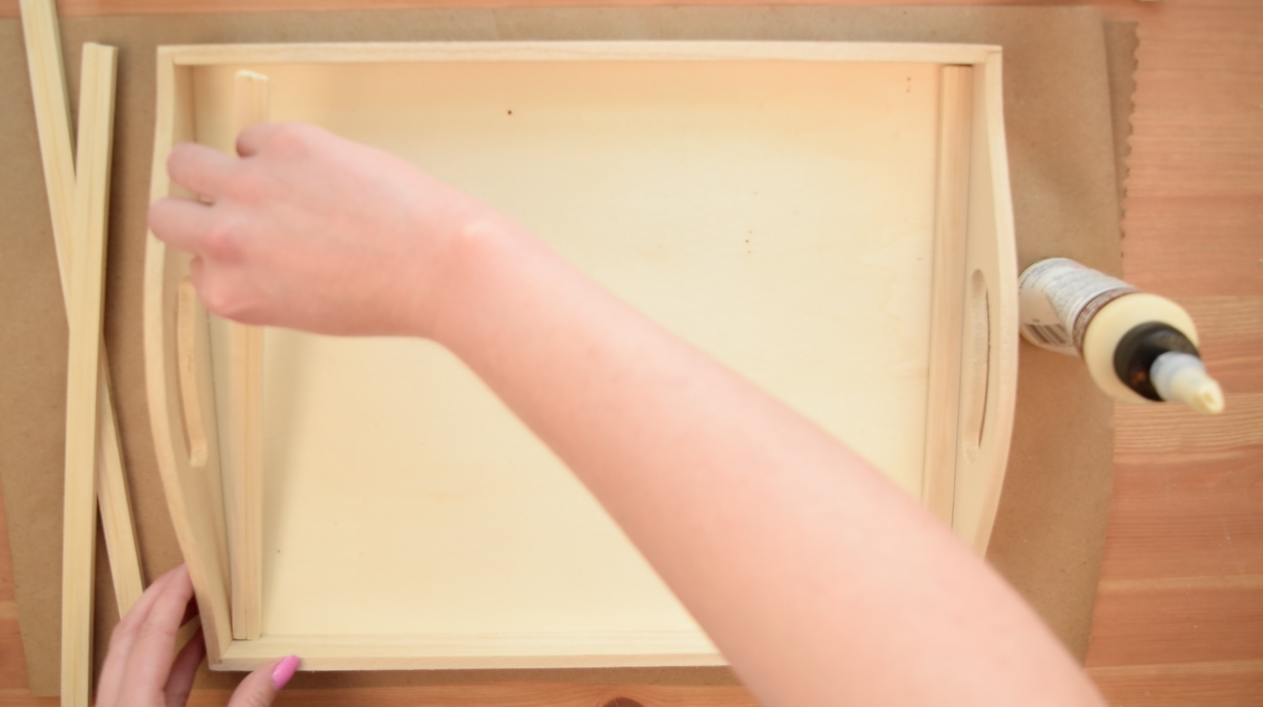
7) Bringing back in the wood glue, it’s time to glue the dowels to the tray. I started with the two shorter dowels, then glued the longer two. I used electrical tape to hold them all in place.
8) After letting the glue dry overnight to make sure it really sets into place, take the tray outside and gave it another good sand, then wipe away any of the remaining wood dust with a towel.
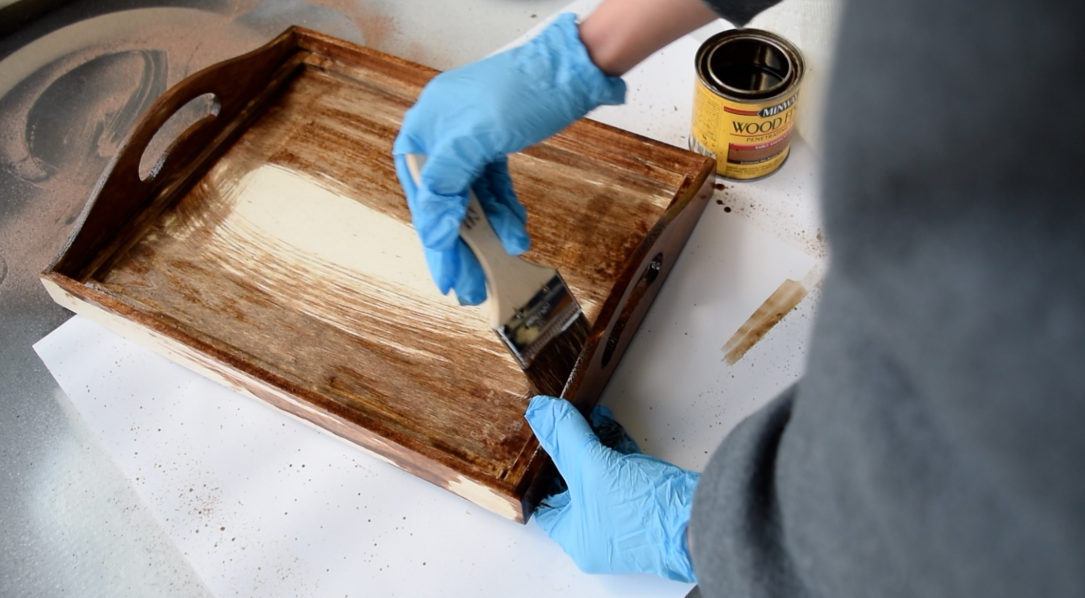

9) Now it’s time finally to stain the tray! I used the color Early American by Minwax (it’s my favorite). Apply the stain to the entire tray, top, sides and bottom. Then let the stain soak in for a few minutes before wiping off the excess. Then repeat the process with a second coat of stain.
10) Next, taking the wood veneer trim like I linked above (find out why I’m using the veneer by watching video above!), measure out roughly (by roughly, I mean more than necessary) enough to go around the inside of the tray. Then give that 2 coats of the stain as well.
11) Let the stain dry completely overnight on both the trim and tray before moving on to the next step.


12) Once the stain is dry, measure the wood trim to the correct size (you can use the measurements from earlier that I used for the dowels), and cut it down. Then cut ¼” off the edge/width of each strip.
13) Next, use wood glue and electrical tape to attach the trim to the top of the dowels. I then put some heavy books on top to hold the pieces in place while the glue dried.

14) After a few hours of drying, it’s time to varnish the tray. This is to protect the wood because it is going to be used outside and to hold drinks. I gave the tray the first coat of varnish, then let it dry completely.
15) Next, this may seem counter-intuitive, but in order to do a second coat of varnish, you have to sand the first (unless your varnish says don’t sand). So I did that, then applied the second coat of varnish.

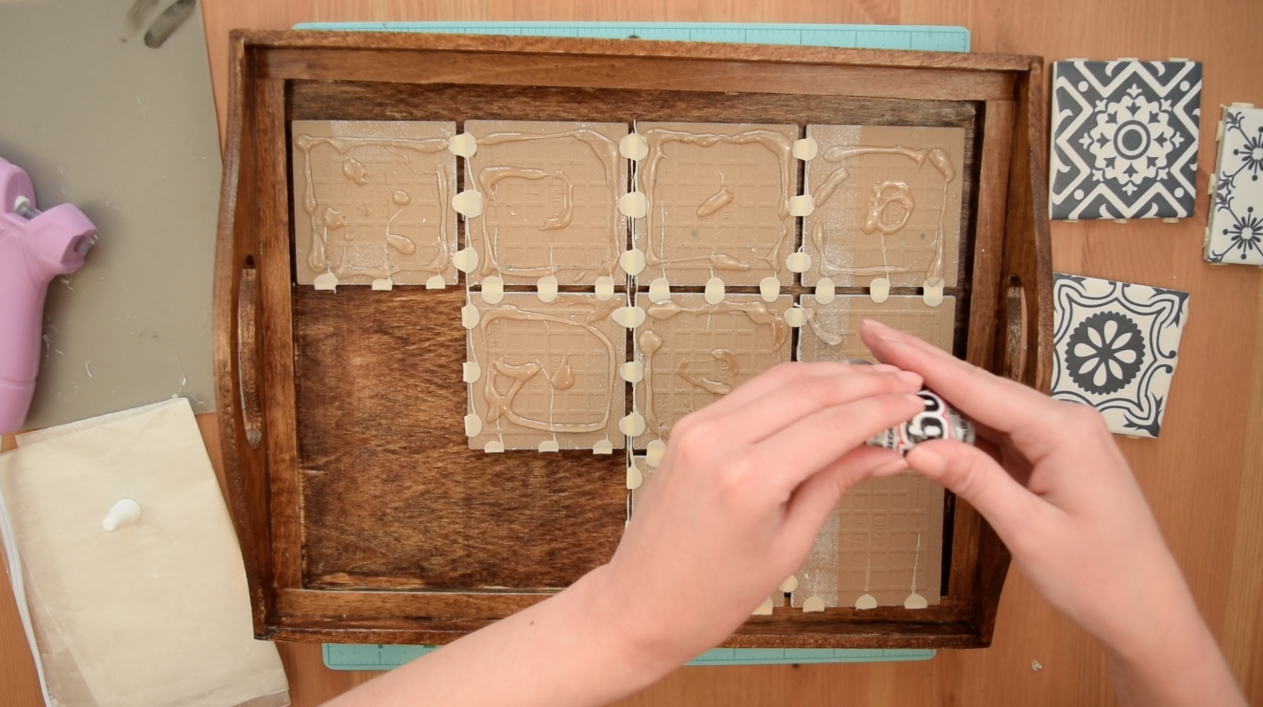
16) With the varnish dry, It’s finally time to bring in the tile. Cut the tile down to size to fit in the inset part of the frame. In my case, I need 3 rows of four tiles. Also, because I’m extra, I decided to pick and choose which tile patterns I wanted, so I swapped some tiles out of the grid.
17) Next, glue the tiles to the tray using E6000 glue on the back of each individual tile. Place the tiles in the tray so there’s about a ¼ inch gap around the edges.
18) Let that glue cure for at least overnight.
19) The next day, use painters tape to mask off all the edges of wood in the bottom of the tray to project them for the next step.

20) Now it’s time for the fun part! Grouting the tile! There are a ton of different kinds of grout, I just picked up the small tub of white grout that you have to mix yourself at the hardware store. All the supplies you need are listed above.
21) I just followed the instructions on the packaging and basically added small amounts of water until it got to the right consistency. I’m not sure how to describe it… you’ll know it when you see it. It almost reminded me of frosting you get in a container, but grainy. Idk friends.
22) After the grout is mixed, you can begin adding it to the tile. I worked with one row of tiles at a time since this was my first attempt at grouting. I used a putty knife to get the grout out of the container, then used an old plastic card (i.e. a gift card or old membership card) to apply the grout in the tile joints. If you want a reference, I linked the video I watched to learn how to grout here. But I found the process to be incredibly simple.
All you do is use the card to push the grout into the tile joint, with sort of a sweeping motion over the joint. I moved the card parallel to the joint to make sure it was really smooth.
Since I’m wearing gloves, I found that using my fingers also worked really well, especially around the edges where the tile and wood meet.
You want to make sure you don’t overly fill the joints, but also should take into account that the grout will settle a bit as a dries. I filled the joints until they were like 85-90% full and that seemed to work well.

23) Once one section of the grout is applied, wet a sponge and use it to wipe the excess grout off the surface of the tiles. Re-dampen the sponge as needed. I also went over the tiles with a dry rag to get off as much of the grout as possible. You do not want to let the grout dry on the surface of the tile… that’ll create problems later on.
24) Next, let the grout dry for at least three hours before moving on to the final steps.

25) To finish the tray, first, of course, remove all the painter’s tape and wipe any of the remaining grout dust off with a damp rag.
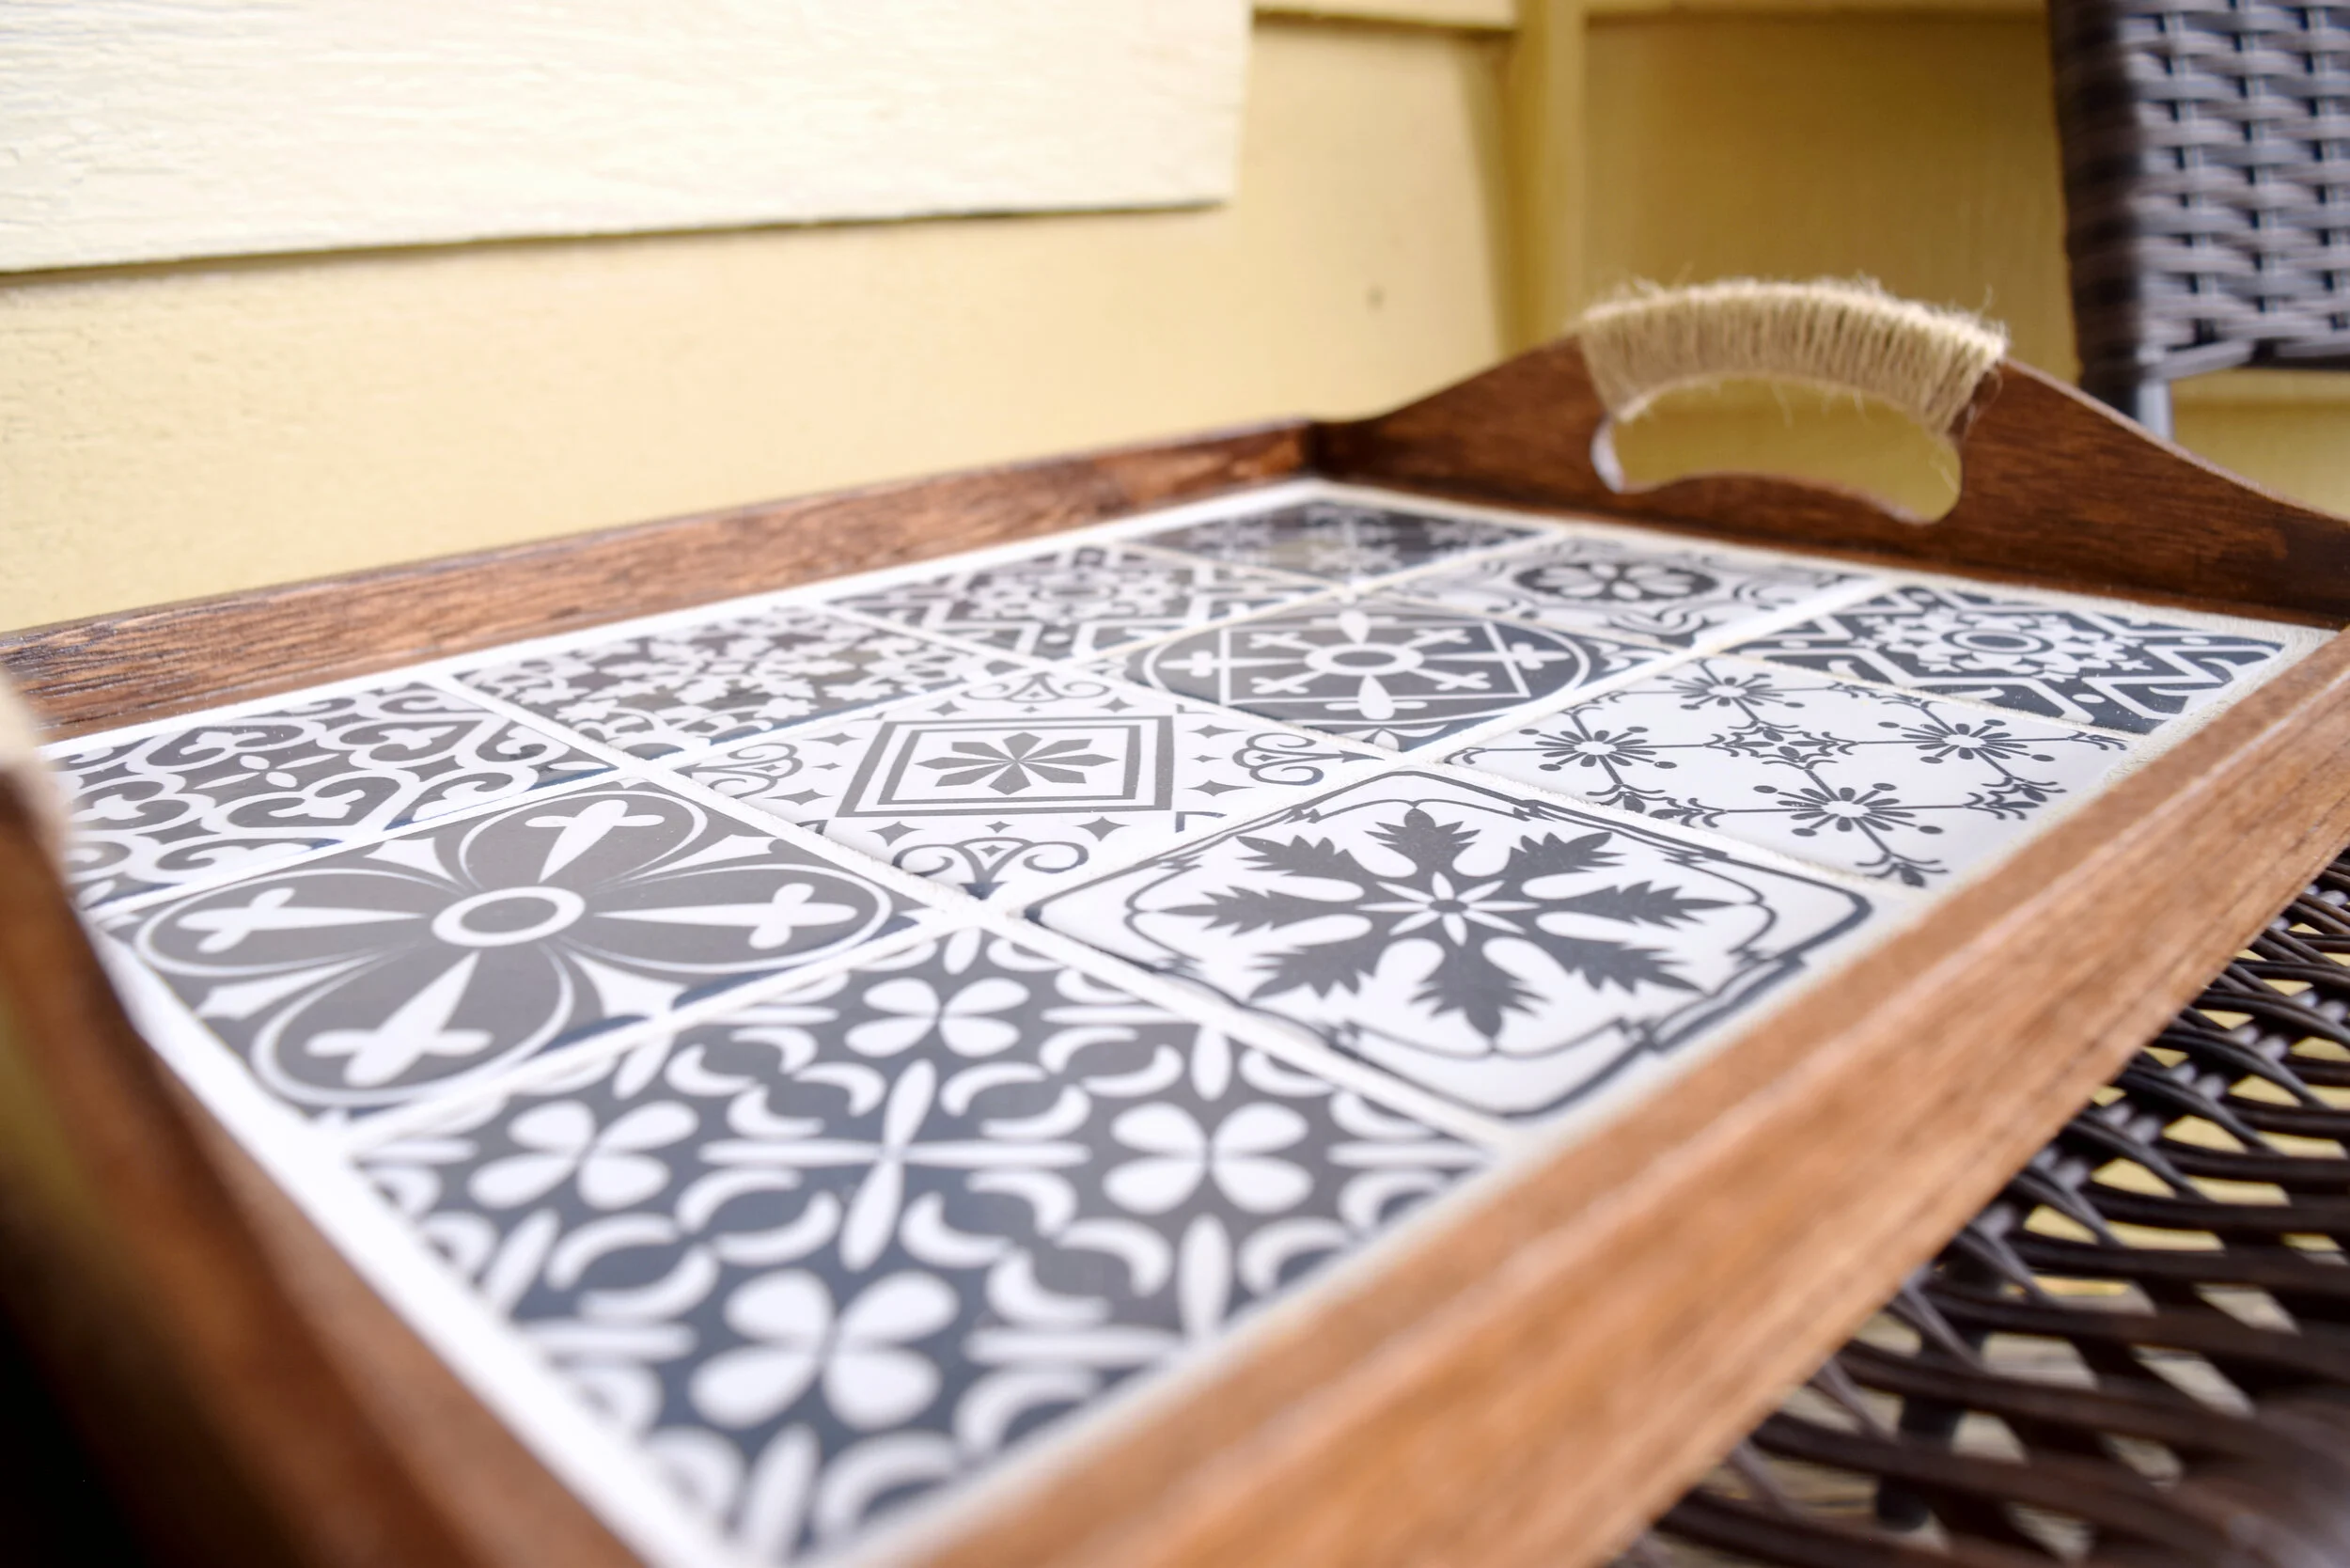
26) Finally, I used some jute cord from Dollar Tree to wrap each of the handles. I used hot glue to attach the jute. I think the simple step of adding the jute really elevated this project and made it look much more finished and even more high end!
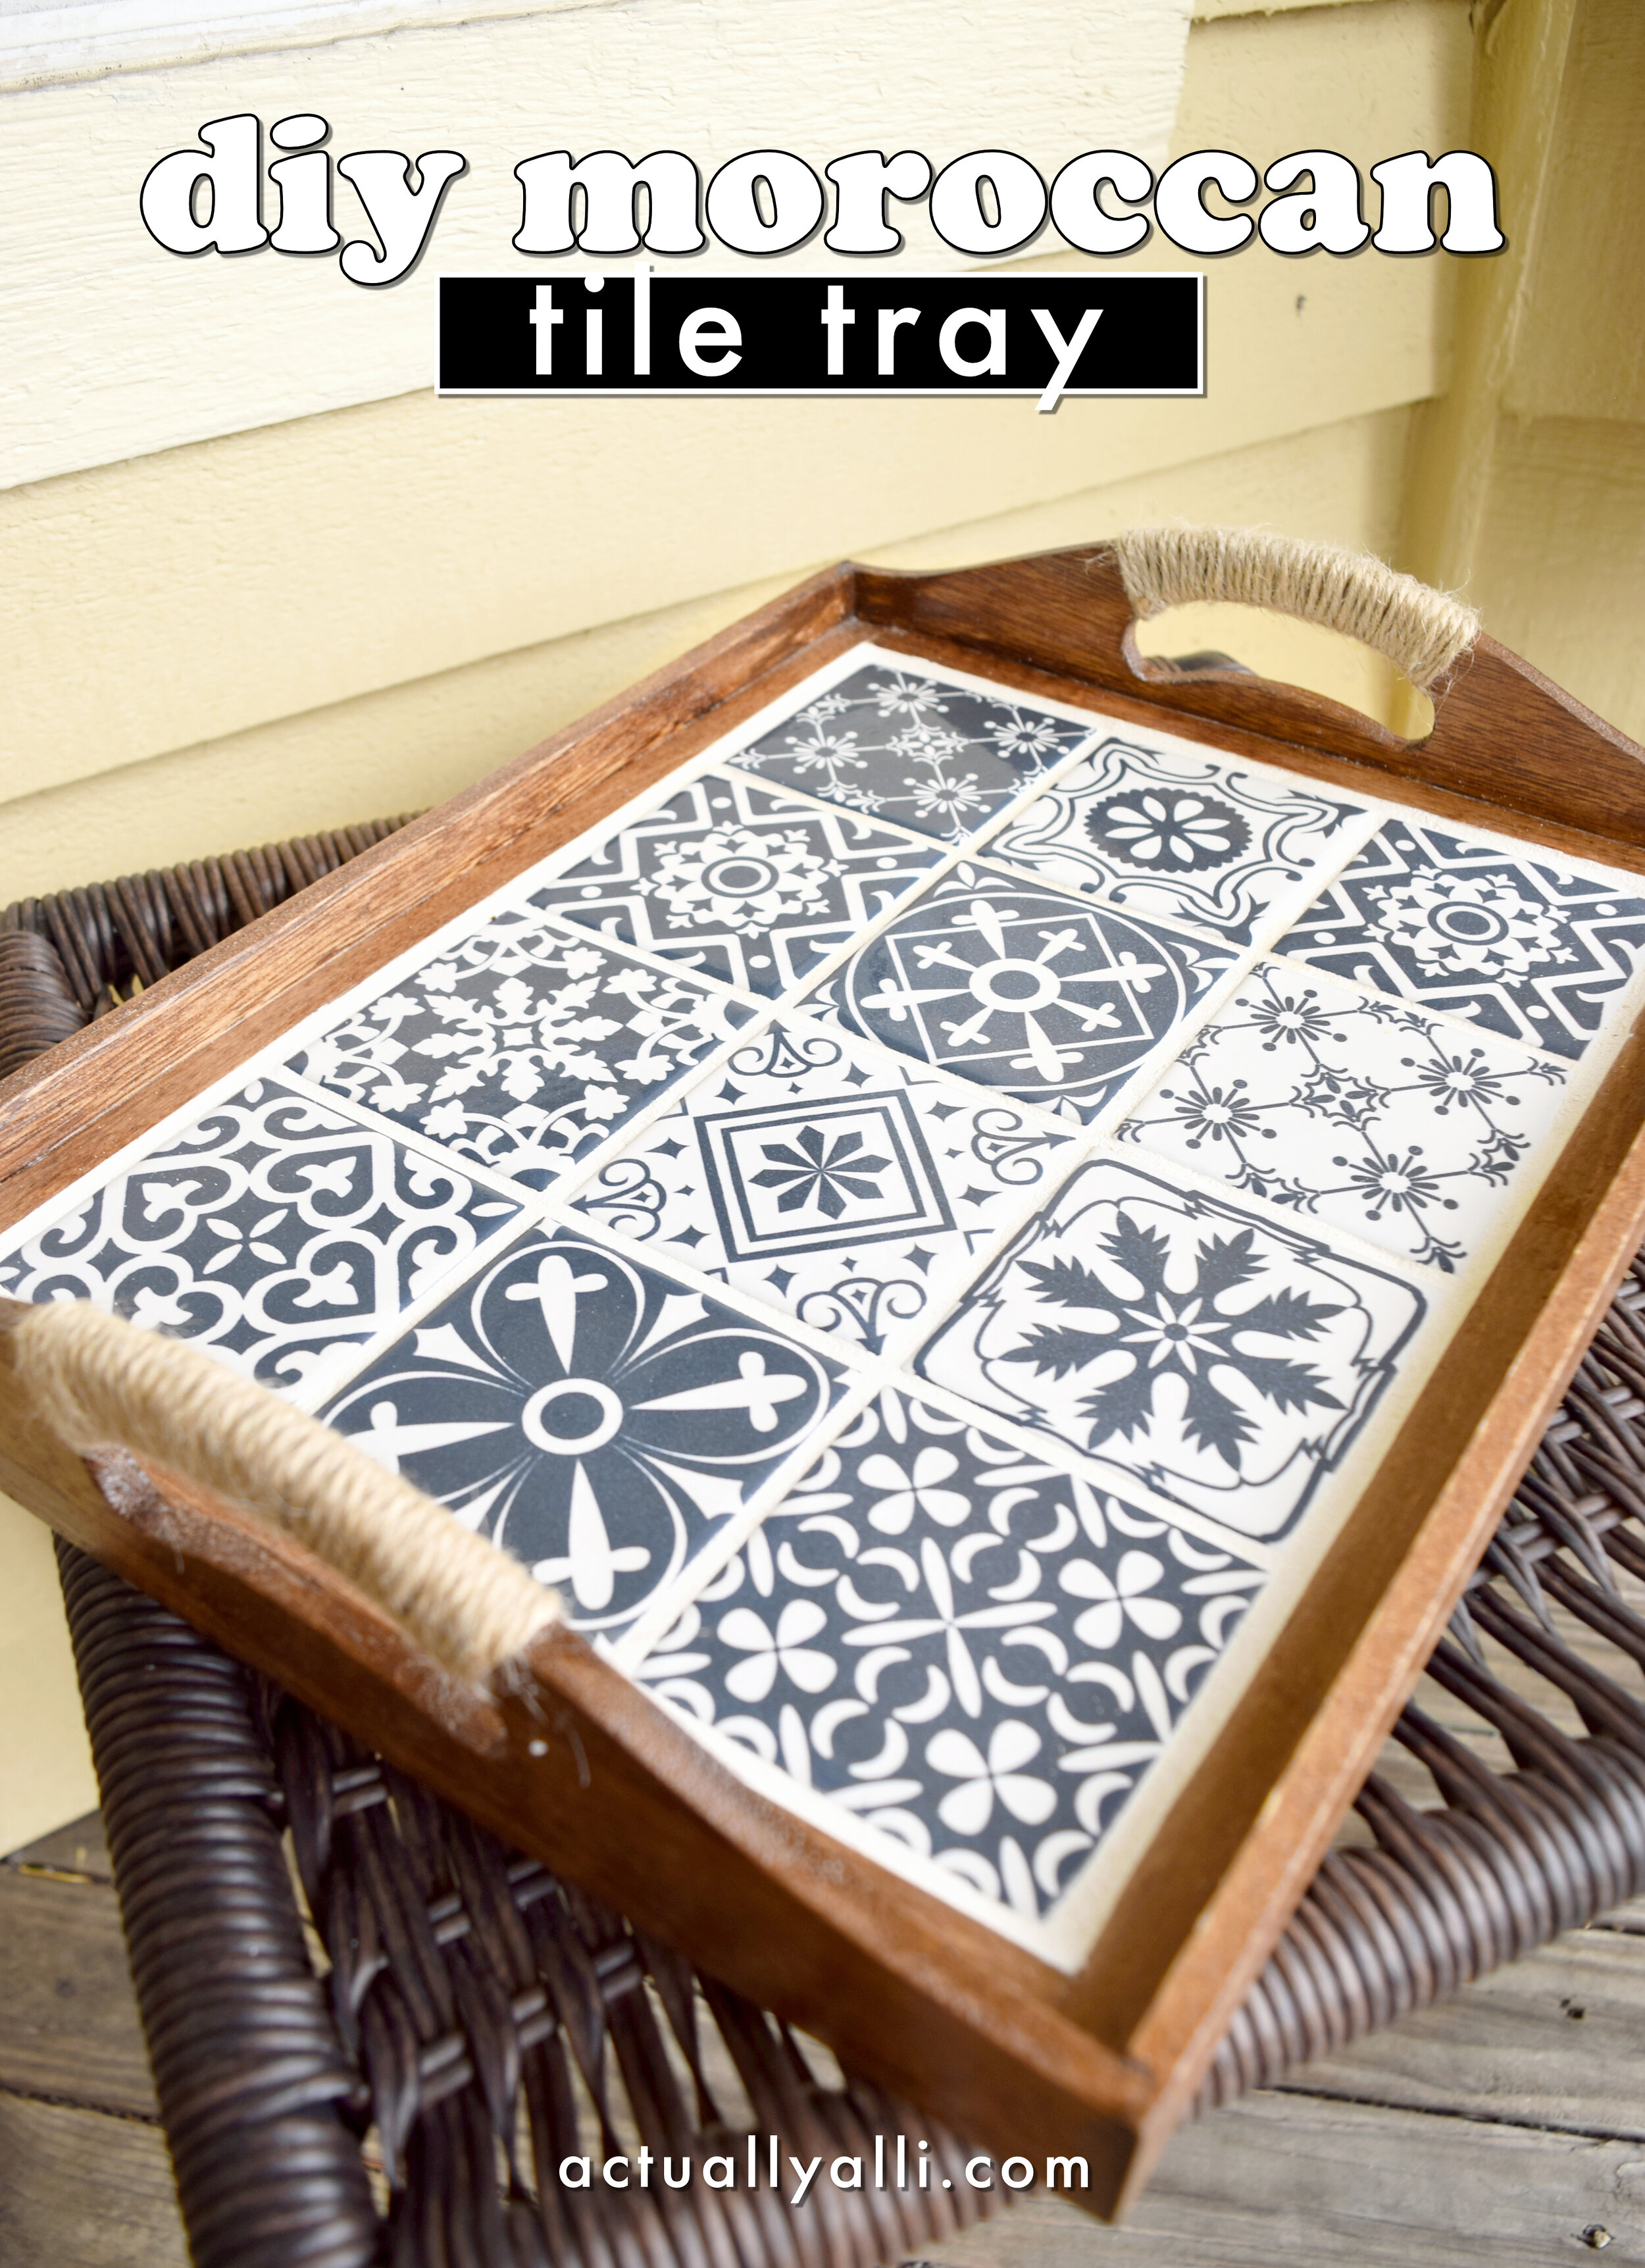
And here are a few photos of how this tray turned out!

It works so perfectly on this small side table on my patio. I’m so excited to use it once the days get a bit warmer and sunnier!
Also, if you want to learn how to make that pretty pitcher of fruit infused water, I included a quick little recipe in the video at the beginning of this post! It’s one of my favorite ways to stay hydrated in the summer months.
I hope you enjoyed this tutorial! I know it’s an in-depth one, but I wanted to make something beautiful that looked store-bought but still had that homemade feel.
If you want to stay updated on all my videos and posts, here’s a few links to my social media accounts:
pin this post


latest posts