3 Easy DIY Pumpkins
Pumpkins are a Halloween classic. So for Day 3 of HalloWeek, I'm showing you 3 easy DIY pumpkins! Two ideas are absolutely no-carve pumpkins, and the last one you'll need a drill. But power tools aside, all the ideas are fast and easy to make!
You can watch the video tutorial below! You’ll find the text instructions underneath that!
Trim Pumpkin
Supplies:
Cream-colored pumpkin (foam or real)
White/cream chalk paint & paint brush
Various trims (at least 4 different trims)
Hot glue
scissors
Instructions:
First I started with a cream foam pumpkin, and since I wanted it to be a little paler, added a watered down coat of white chalk paint
Once the paint was dry, I chose 4 various black and orange trims and began hot gluing them around the pumpkin. I wanted to keep with classic Halloween colors to match my decor, but go ahead and choose whatever colors you want to use! I think pastels or rainbow colors would look awesome too.
And really that’s all you have to do!
Word Art Pumpkin
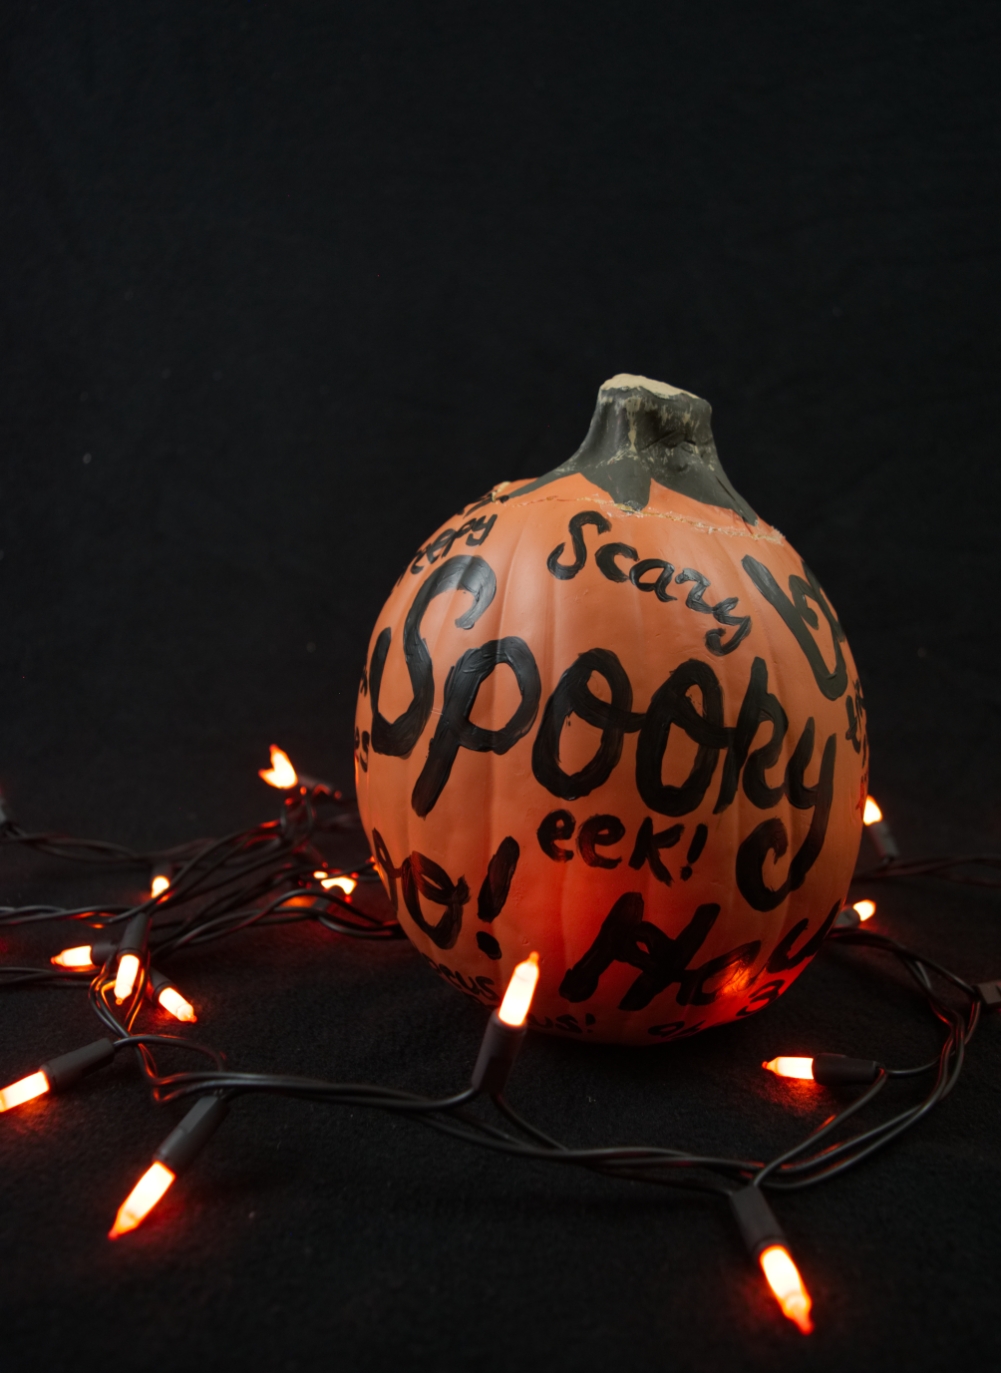
Here’s another simple pumpkin idea that would work great on a real pumpkin too.
Supplies:
Pumpkin (real or foam)
Black chalk or acrylic paint
Paint brushes
Instructions:
First, take a pencil and write on a bunch of Halloween adjectives in various sizes. Here’s a list of the words I used:
Wicked, haunt, boo, batty, hocus pocus, 31st, spooky, scary, ahhh, eek, creepy, trick-or-treat, ghostly, yikes, horror
Once the words are drawn on, go over them with black chalk or acrylic paint.
After you add a second coat of paint, your word art pumpkin is ready to be displayed.
Constellation Pumpkin
Supplies:
Pumpkin (foam or real)
Navy blue chalk paint & paint brush
Drill with a 1/4 and 1/8 bit
Pencil
Craft knife
Battery-operated tea light (or candle if you used a real pumpkin!)
Instructions:
First, you’ll need to carve the top of the pumpkin off.
Then, paint the entire pumpkin in navy blue chalk paint.
Once the paint is dry, it’s time to draw on the constellations. I wanted mine to reflect the October sky, so I printed out this star chart
Now onto the drilling. I’m using two different drill bits. I started with the quarter inch bit to make the bigger stars. Then I used a 1/8th inch bit to make the smaller stars.
Once all the stars are drilled, carefully use a craft knife to carve in the lines. Make sure you don’t connect the lines to the stars, and try not to put the knife completely through the pumpkin. It took me a couple goes over each line to make them visible.
After that, put a battery-operated tea light inside and you have a constellation pumpkin to match the night sky.
latest posts